Introduction
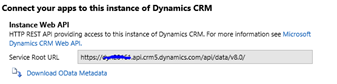
In the recent release, Microsoft has provided the ability using which we can perform different CRUD operations using Portals WEB API. The operations will run at server-side and are similar to Dynamics Web API Operations but the difference is in the way it is written and called in PowerApps Portals.
If you have a custom web page with a page template or web template and you want data displayed in the custom web page to be stored in Dynamics by performing some business logic then you need to use PowerApps Portals API, which will communicate with the Dynamics 365 in the backend and perform the required operation in Dynamics 365.
Let us consider a requirement where we need to record our punch in details, punch out details and if there is any incorrect entry then we need to delete that punch details. For this scenario, we will use PowerApps Portals Web API and see how we can implement the requirement.
So we will execute below four operations,
– Retrieve record
– Create record
– Update record
– Delete record
Before going directly to Web API, we need to first look at what are the configurations we need to do to allow Web API operations in PowerApps Portals.
Please check the below screenshots of the Portal Site Settings to allow Web API Operations in PowerApps Portal.
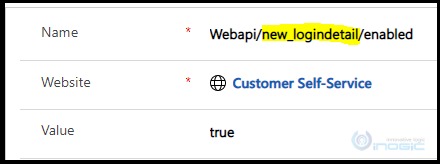
1. Create Site Setting in PowerApps Portal as below:
a. Enable the entity in PowerApps Portals
Note: new_logindetail is the logical name of the custom entity.
![Execute Different WebAPI Operations using PowerApps Portals]()
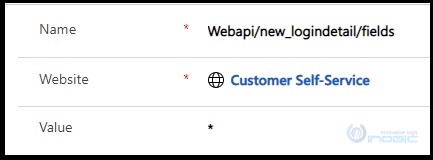
b. Enable fields for API Operations
![Execute Different WebAPI Operations using PowerApps Portals]()
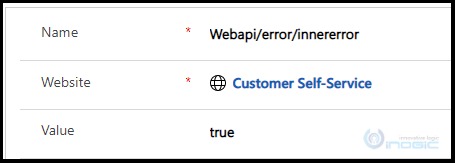
c. Show Web API Errors in Portal
![Execute Different WebAPI Operations using PowerApps Portals]()
Note: You need to create a Site Setting for each entity that needs to be enabled for Web API and if you want to enable all fields for Web API operations then you can use “*” or else you can specify the logical name of each field separated by a comma.
2. Create Entity Permission and Create new web role for Web API
You can navigate to Entity Permission entity directly from the navigation pane.
![Execute Different WebAPI Operations using PowerApps Portals]()
Note: The highlighted is the custom entity used for performing Web API Operations. You can select any other entity which you want and give the privileges as shown above for the new Web Role which we will use for performing Web API Operations.
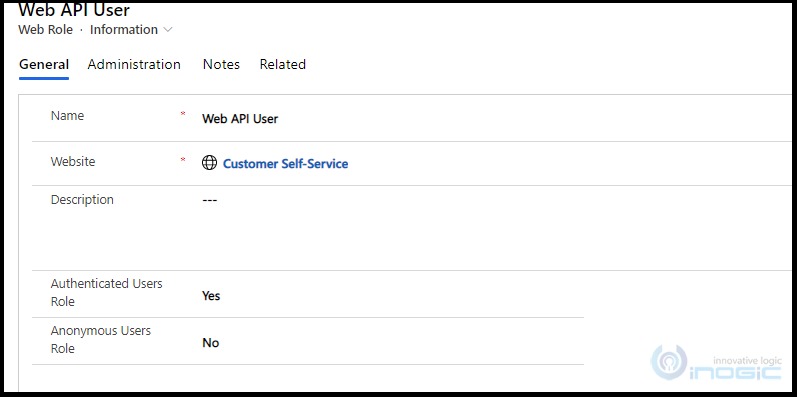
![Execute Different WebAPI Operations using PowerApps Portals]()
Note: You can give any name to the Web Role but make sure to set Authenticated Users Role to Yes. By doing this only portal users i.e. authenticated users will able to perform Portal Web API CRUD Operations.
After our configurations are done, now we will see how we can perform different Web API operations in PowerApps Portal.
For executing Web API, Microsoft has provided a Wrapper AJAX function which we can use for executing any Web API method for any entity. Please check the below link to get and use the Wrapper AJAX function in your code.
https://docs.microsoft.com/en-us/powerapps/maker/portals/web-api-perform-operations#wrapper-ajax-function
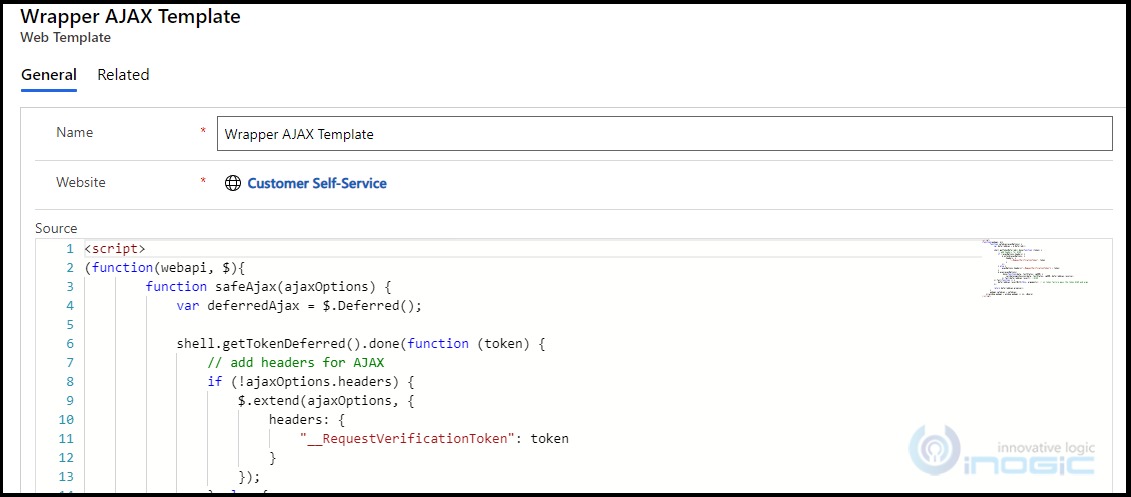
As this is a common function which we can use for any Web API operations in the portal, so I will create a new Web Template and simply copy-paste the function code in the created Web Template as below:
AJAX Function Code Snippet:
<script>
(function(webapi, $){
function safeAjax(ajaxOptions) {
var deferredAjax = $.Deferred();
shell.getTokenDeferred().done(function (token) {
// add headers for AJAX
if (!ajaxOptions.headers) {
$.extend(ajaxOptions, {
headers: {
“__RequestVerificationToken”: token
}
});
} else {
ajaxOptions.headers[“__RequestVerificationToken”] = token;
}
$.ajax(ajaxOptions)
.done(function(data, textStatus, jqXHR) {
validateLoginSession(data, textStatus, jqXHR, deferredAjax.resolve);
}).fail(deferredAjax.reject); //AJAX
}).fail(function () {
deferredAjax.rejectWith(this, arguments); // on token failure pass the token AJAX and args
});
return deferredAjax.promise();
}
webapi.safeAjax = safeAjax;
})(window.webapi = window.webapi || {}, jQuery)
</script>
So our Wrapper AJAX template will look as seen from the below screenshot
![Execute Different WebAPI Operations using PowerApps Portals]()
Now, whenever we want to refer to this in any other Web Template, you just need to use the below line of code:
{% include ‘Wrapper AJAX Template’ %}
Note that here I have used my newly created Web Template name i.e. ‘Wrapper Ajax Template’.
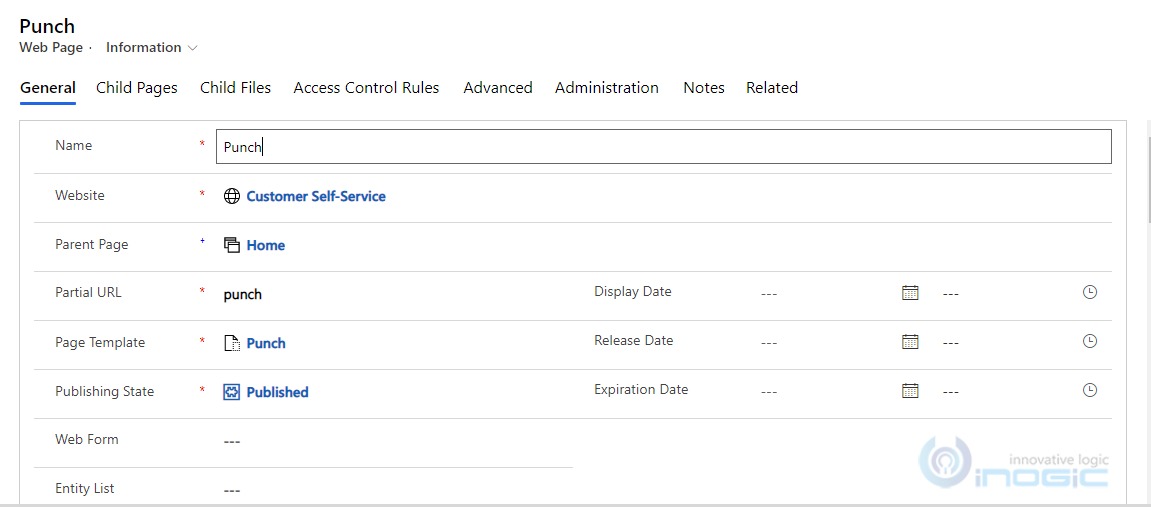
Now let us create a new page, which will be visible when the user login the portal and allows the user to punch in from the portal. Remember in the web page we will just add an HTML page using a Page template using which the user can do Punch In. Following are the details of the web page created.
![Execute Different WebAPI Operations using PowerApps Portals]()
In order to render HTML in Web Page, I have use Web Template but you can also use Content Page of Web Page to add your custom HTML in the Web Page. I will perform all CRUD operations in the Web Template. Now let’s understand that in step by step.
1. There is a custom entity created in Dynamics to store the Login/Logout Details in CRM. First, we will retrieve Punch In details created today and if Punch In the record found then we will display that in the table in HTML.
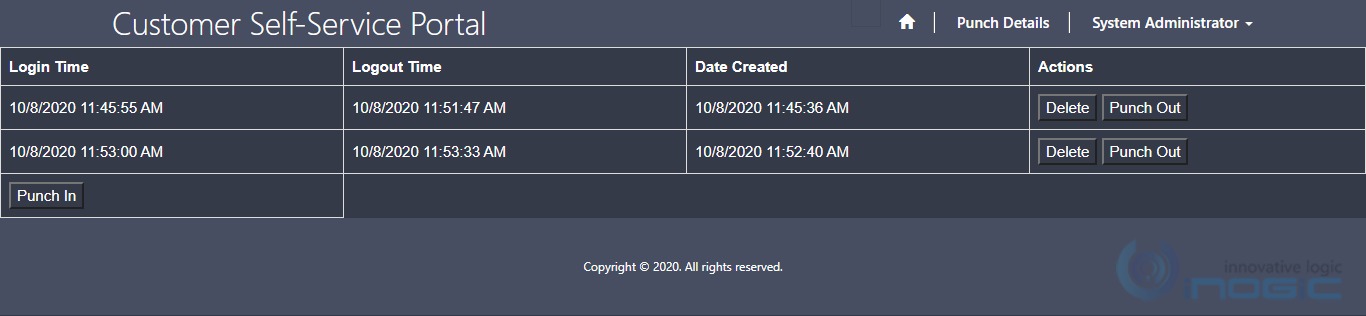
2. We will have 3 buttons “Punch In”, “Punch Out” and “Delete” to perform the respective operations using Portals Web API.
Our final HTML will look like below,
![Execute Different WebAPI Operations using PowerApps Portals]()
To retrieve the data from CRM, we can use normal FetchXml and display data in HTML table by looping through each punch in record if record exist already. Below is the code to retrieve and the data and display it in the HTML Table.
{% fetchxml punchdetails %}
<fetch version=”1.0″ output-format=”xml-platform” mapping=”logical” distinct=”false”>
<entity name=”new_logindetail”>
<attribute name=”new_logindetailid” />
<attribute name=”new_logouttime” />
<attribute name=”new_logintime” />
<attribute name=”createdon” />
<order attribute=”createdon” descending=”false” />
<filter type=”and”>
<condition attribute=”createdon” operator=”today” />
</filter>
</entity>
</fetch>
{% endfetchxml %}
<table>
<tr><th>Login Time</th><th>Logout Time</th><th>Date Created</th><th>Actions</th>
{% for item in punchdetails.results.entities %}
<tr>
<td>{{item.new_logintime}}</td>
<td>{{item.new_logouttime}}</td>
<td>{{item.createdon}}</td>
<td>
<button type=”button” id=”delete” onclick=”deletePunchDetails(‘{{item.new_logindetailid}}’)”>Delete</button>
<button type=”button” id=”punch_out” onclick=”updatePunchDetails(‘{{item.new_logindetailid}}’)”>Punch Out</button>
</td>
</tr>
{% endfor -%}
<tr>
<td><button type=”button” id=”punch_in” onclick=”addPunchDetails()”>Punch In</button></td>
</tr>
</table>
Below is the screenshot of the how web template will look like after adding the code. In the same way, you need to add the code in the Web Template.
![]()
Please note “punchdetails” is the name of the fetchXml variable which we need to use to retrieve the results from fetchXml. Also, to update and delete specific entry we need to add Update and Delete buttons in each row dynamically and call the respective function by passing GUID of the record.
We don’t need to add Punch In in each row as Punch In button is used to create a new record of Login/Logout Details in CRM.
Now we will see the code for each of the Web API request.
1. Create Punch In record:
function addPunchDetails()
{
webapi.safeAjax({
type: “POST”,
url: “/_api/new_logindetails”,
contentType: “application/json”,
data: JSON.stringify({
“new_logintime”: new Date(), //Date Time
“new_name”: “Login_”+new Date().toLocaleDateString(), //String
“new_loginattempts”:1, //Whole Number
“new_usertype”:2 //Option Set
“new_user@odata.bind”:”/contacts({{user.Id}})”, //Setting Logged In User(Lookup)
“new_workingday”: “2,3,4” //Multi-Select Option Set
}),
success: function (res, status, xhr) {
}
});
}
When webapi.safeAjax is executed, it calls the AJAX Wrapper class which we already added in another web template and references it in this web template.
Also, fields which I used for create request are based on my requirement but you can use different fields with different data type as well.
2. Update or Punch Out:
function updatePunchDetails(id)
{
webapi.safeAjax({
type: “PATCH”,
url: “/_api/new_logindetails(“+id+”)”,
contentType: “application/json”,
data: JSON.stringify({
“new_logouttime”: new Date()
}),
success: function (res) {
console.log(res);
}
});
}
The id parameter which we pass to this method is the GUID of the record that we pass from the loop above. Similarly, we will have to pass the parameter to DELETE method as well as below:
3. Delete Punch entry from CRM
function deletePunchDetails(id)
{
webapi.safeAjax({
type: “DELETE”,
url: “/_api/new_logindetails(“+id+”)”,
contentType: “application/json”,
success: function (res) {
console.log(res);
}
});
}
Note: Also, when you create record from portal “System” will be set as the Owner of the record.
Records created in CRM:
![Execute Different Web API Operations using PowerApps Portals]()
Also as mentioned above, if the user don’t have permission to access page or anonymous users will not be able to see the page and hence won’t be able to perform Web API Operations as seen from the below screenshot.
For Anonymous Users:
![Execute Different Web API Operations using PowerApps Portals]()
Note: All PowerApps Portal Web API Operations follow OData query syntax and work in the same manner as our Dynamics OData query works.
Conclusion
In this way, you can execute different Web API operations as per your requirement from PowerApps Portals.
One Pic = 1000 words! Analyze data 90% faster with visualization apps!
Get optimum visualization of Dynamics 365 CRM data with –
Kanban Board – Visualize Dynamics 365 CRM data in Kanban view by categorizing entity records in lanes and rows as per their status, priority, etc.
Map My Relationships – Map My Relationships – Visualize connections and relationships between Dynamics 365 CRM entities or related records in a Mind Map view.
The post Execute Different Web API Operations using PowerApps Portals (Preview) first appeared on Microsoft Dynamics 365 CRM Tips and Tricks.